As promised, here’s a rough guide for building AviSynth+ on Haiku, with a couple necessary helper tools/plugins. Hopefully I haven’t missed anything in the following, especially as it concerns 32-bit.
AviSynth+ requires a C++17 compiler due to making use of std::filesystem. GCC8 meets this criteria.
64-bit:
Requirements:
CMake
Ninja (optional)
devil and devil_devel (for ImageSeq plugin)
- git clone git://github.com/AviSynth/AviSynthPlus.git
- cd AviSynthPlus
- mkdir avisynth-build
- cd avisynth-build
- cmake
../ -G Ninja -DCMAKE_INSTALL_PREFIX=$HOME/config/non-packaged
- ninja
- ninja install
EDIT: The forum seems to render ../ as three dots instead of two unless I put it in preformatted markup.
avs2yuv is a small piping tool that accepts AviSynth scripts as input and outputs either yuv4mpeg or raw. This can be piped into the system FFmpeg.
avs2yuv:
- git clone git://github.com/DJATOM/avs2yuv.git
- cd avs2yuv
- PKG_CONFIG_PATH=$HOME/config/non-packaged/lib/pkgconfig make install PREFIX=$HOME/config/non-packaged
With those installed, you can verify that AviSynth+ was installed correctly:
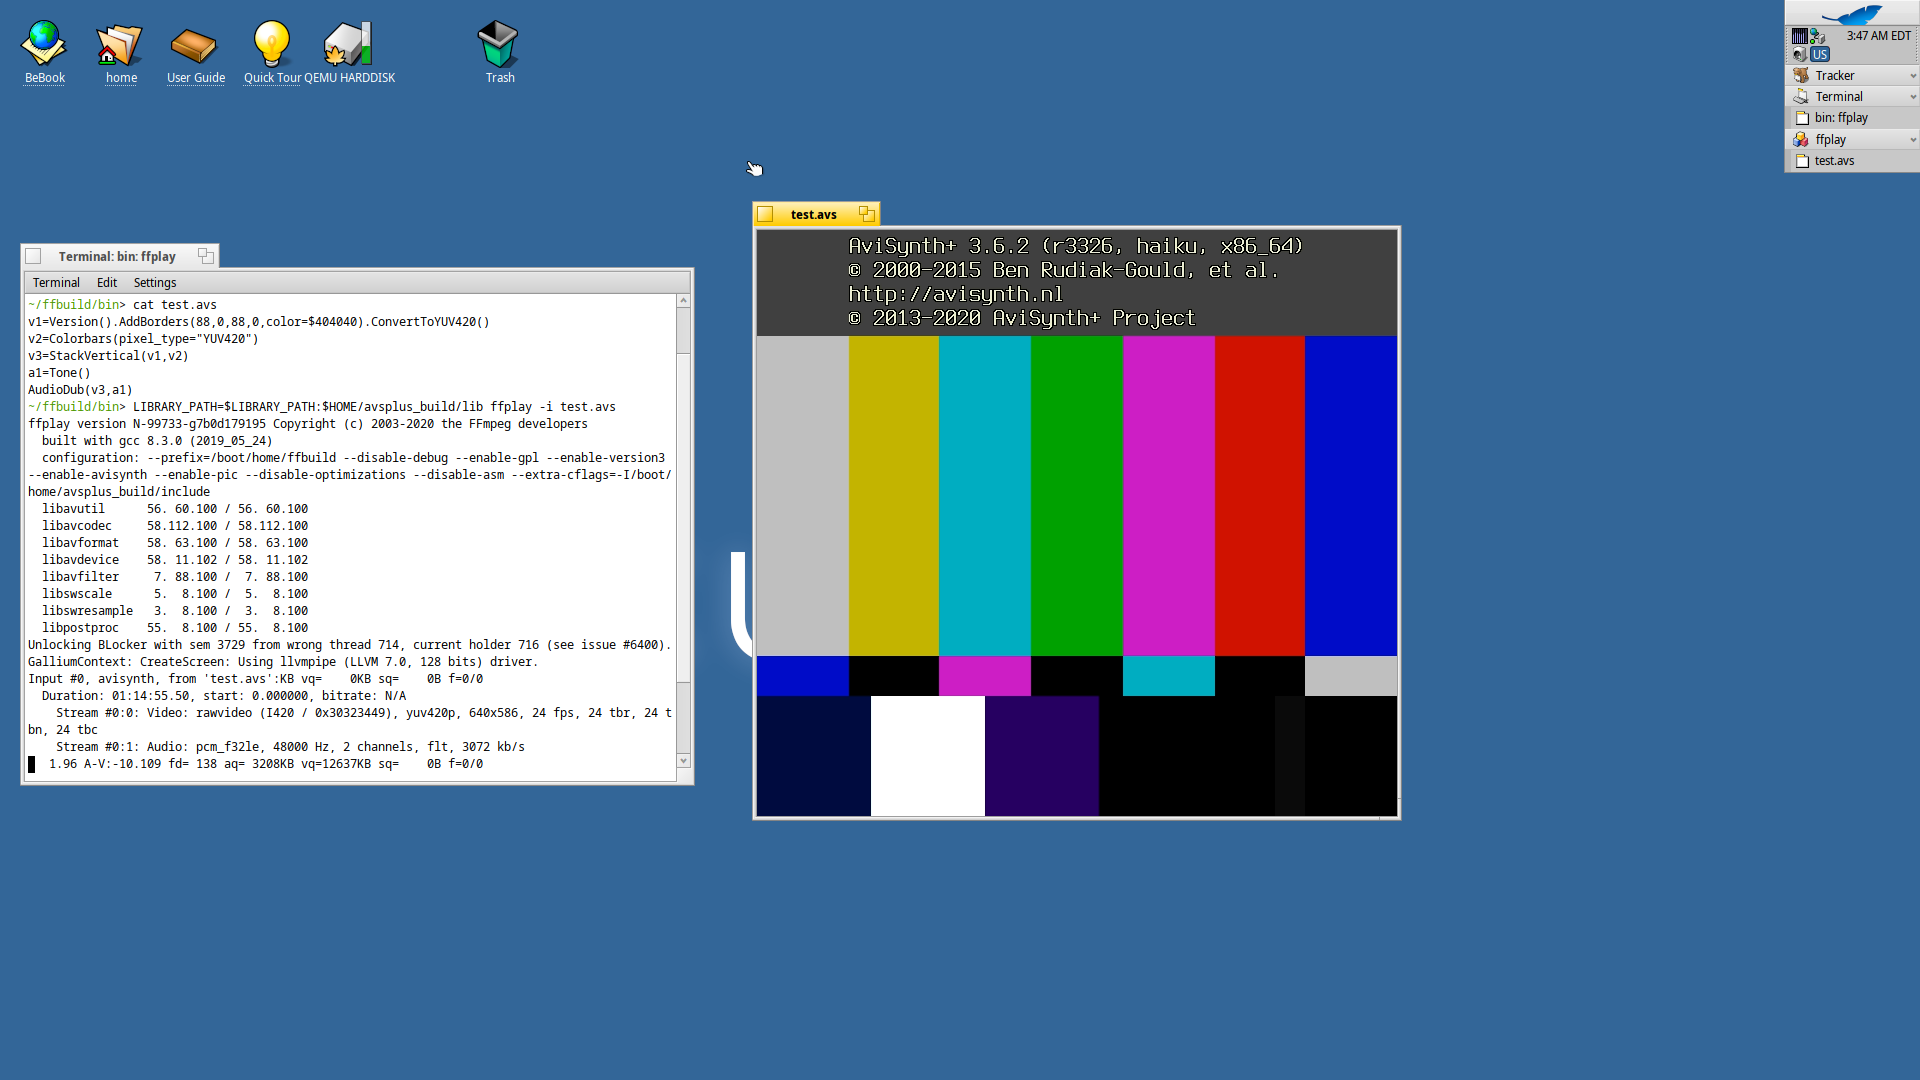
- echo Version\(\).ConvertToYUV420\(\)>test.avs
- avs2yuv test.avs -o - | ffplay -i -
If it was installed correctly, the video window will pop up with the version text on a grey background.
Of course, avs2yuv has a downside, in that it can only output YUV formats, and it doesn’t pipe audio either. To get access to both RGB formats and audio, you’ll need a build of FFmpeg that accepts AviSynth scripts as input.
ffmpeg (4.3 or git required to use AviSynth+ on non-Windows):
Unfortunately, there’s something the matter with the asm, as it spits out errors relating to PIC no matter what I pass to FFmpeg’s configure. --disable-mmx and --disable-mmxext get rid of most of them, apart from stuff in h264 and hevc’s cabac_tables. --disable-asm isn’t optimal but it lets it actually build. This only affects 64-bit.
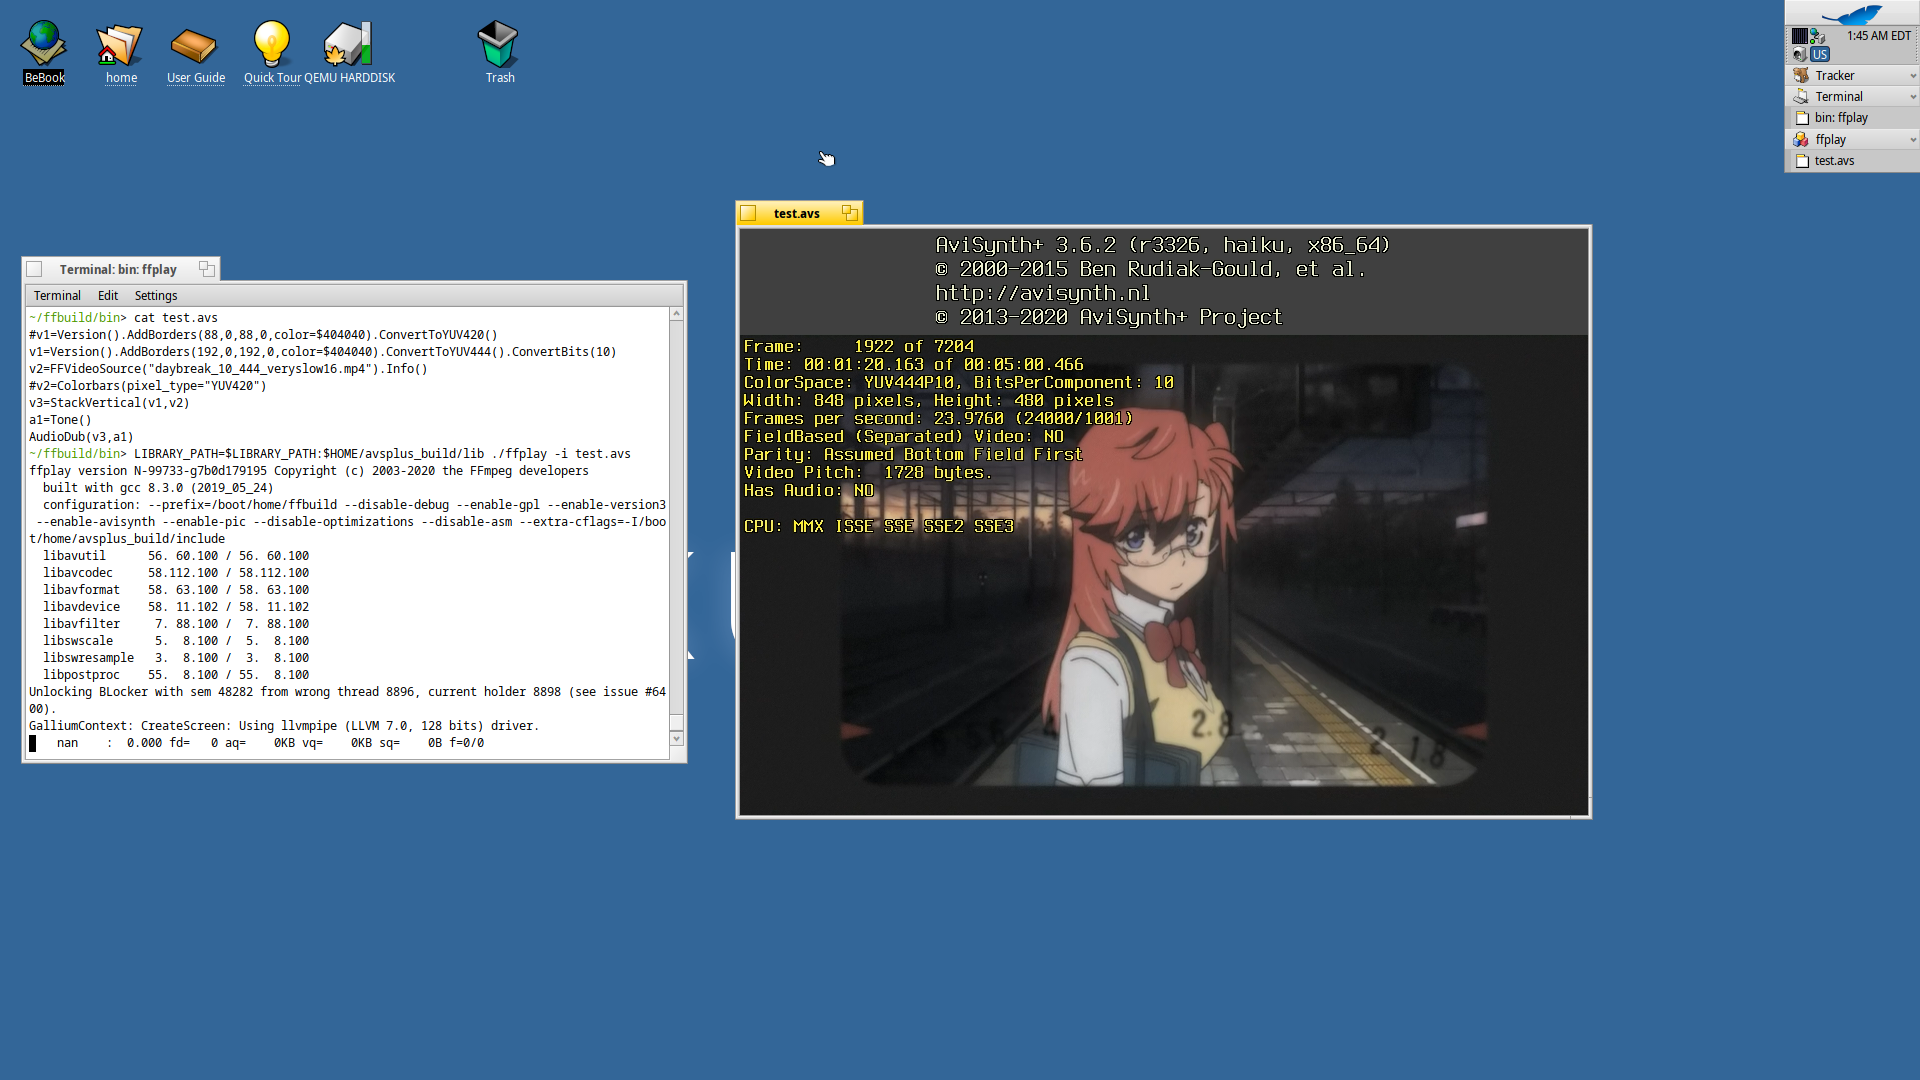
Now you should be able to play back the script directly:
- ffplay-avs -i location/of/test.avs
Since ImageSeq would have been built as well, you can also test with a real image file (assuming the script is created in the same directory as test.jpg):
- echo ImageSource\(\“test.jpg\”\)>test.avs
FFMS2:
Requirements:
autoconf, automake, libtool, m4
With FFMS2, it’s possible to import video in any format that FFmpeg can demux/decode. First, it needs to index the video, which is done either the first time the script is opened, or the user can index the file themselves using the ffmsindex utility that was built and installed with FFMS2.
- ffmsindex -t -1 test.mkv
-t -1 indexes the first audio track it can find. Positive integers select the corresponding audio track where more than one audio track exists.
- echo FFmpegSource2\(\“test.mkv\”\,atrack=-1)>test.avs
The atrack=-1 parameter is necessary for audio to be loaded in the script.
Unlike when using stuff strictly in the AviSynth+ core (like Version()) or ImageSource(), FFMS2 seems to suppress the info readout when the script is loaded in FFmpeg. It should still be able to function, though. On Linux this behavior is only seen when using a shared version of the FFmpeg libraries, but as that’s not the case here I have no clue what’s going on.
32-bit:
Requirements:
CMake
Ninja (optional)
devil_x86 and devil_x86_devel (for the ImageSeq plugin)
avs2yuv is a small piping tool that accepts AviSynth scripts as input and outputs either yuv4mpeg or raw. This can be piped into the system FFmpeg.
- git clone git://github.com/DJATOM/avs2yuv.git
- cd avs2yuv
- export PATH=/system/bin/x86:$PATH
- PKG_CONFIG_PATH=$HOME/config/non-packaged/lib/x86/pkgconfig make
- cp avs2yuv $HOME/config/non-packaged/bin/x86
With those installed, you can verify that AviSynth+ was installed correctly:
- echo Version\(\).ConvertToYUV420\(\)>test.avs
- ~/config/non-packaged/bin/x86/avs2yuv test.avs -o - | ffplay -i -
If it was installed correctly, the video window will pop up with the version text on a grey background.
Of course, avs2yuv has a downside, in that it can only output YUV formats, and it doesn’t pipe audio either. To get access to both RGB formats and audio, you’ll need a build of FFmpeg that accepts AviSynth scripts as input.
ffmpeg (4.3 or git required to use AviSynth+ on non-Windows):
Now you should be able to play back the script directly:
- ~/config/non-packaged/bin/x86/ffplay-avs -i location/of/test.avs
Unfortunately, something was not right with the build on my end, as ffplay-avs would crash immediately as soon as the window opened. I could get around it by piping from ffmpeg-avs to the system’s ffplay, though:
- ~/config/non-packaged/bin/x86/ffmpeg-avs -i location/of/test.avs -c copy -f nut - | ffplay -i -
Since ImageSeq would have been built as well, you can also test with a real image file (assuming the script is created in the same directory as test.jpg):
- echo ImageSource\(\“test.jpg\”\)>test.avs
FFMS2:
Requirements:
autoconf, automake, libtool, m4
With FFMS2, it’s possible to import video in any format that FFmpeg can demux/decode. First, it needs to index the video, which is done either the first time the script is opened, or the user can index the file themselves using the ffmsindex utility that was built and installed with FFMS2.
- ~/config/non-packaged/bin/x86/ffmsindex -t -1 test.mkv
-t -1 indexes the first audio track it can find. Positive integers select the corresponding audio track where more than one audio track exists.
- echo FFmpegSource2\(\“test.mkv\”\,atrack=-1)>test.avs
The atrack=-1 parameter is necessary for audio to be loaded in the script.
Unlike when using stuff strictly in the AviSynth+ core (like Version()) or ImageSource(), FFMS2 seems to suppress the info readout when the script is loaded in FFmpeg. It should still be able to function, though. On Linux this behavior is only seen when using a shared version of the FFmpeg libraries, but as that’s not the case here I have no clue what’s going on.