I am relatively new to Haiku. While installing Haiku in Parallels according to Virtualizing Haiku in Parallels Desktop | Haiku Project two disks are created. Bootable 700 MB and 4GB where system should be installed. While everything is going smoothly, the effect is slightly different than in the instructions and the video. 4GB disk remains inactive, and only the small 700MB one works. This restricts updates and installation of new software, as the disk has little free space and gets full immediately. Booting from second disk doesn’t work at all.
So, Haiku is essentially a demo rather in these circumstances.
When the installer starts, did you run partition tool and formatted your 4Gb drive to Be file system? After that you need to install haiku onto it. When that is done, you can remove the 700Mb (guessing ISO image) and boot of your hard drive (4gb that you just installed to)
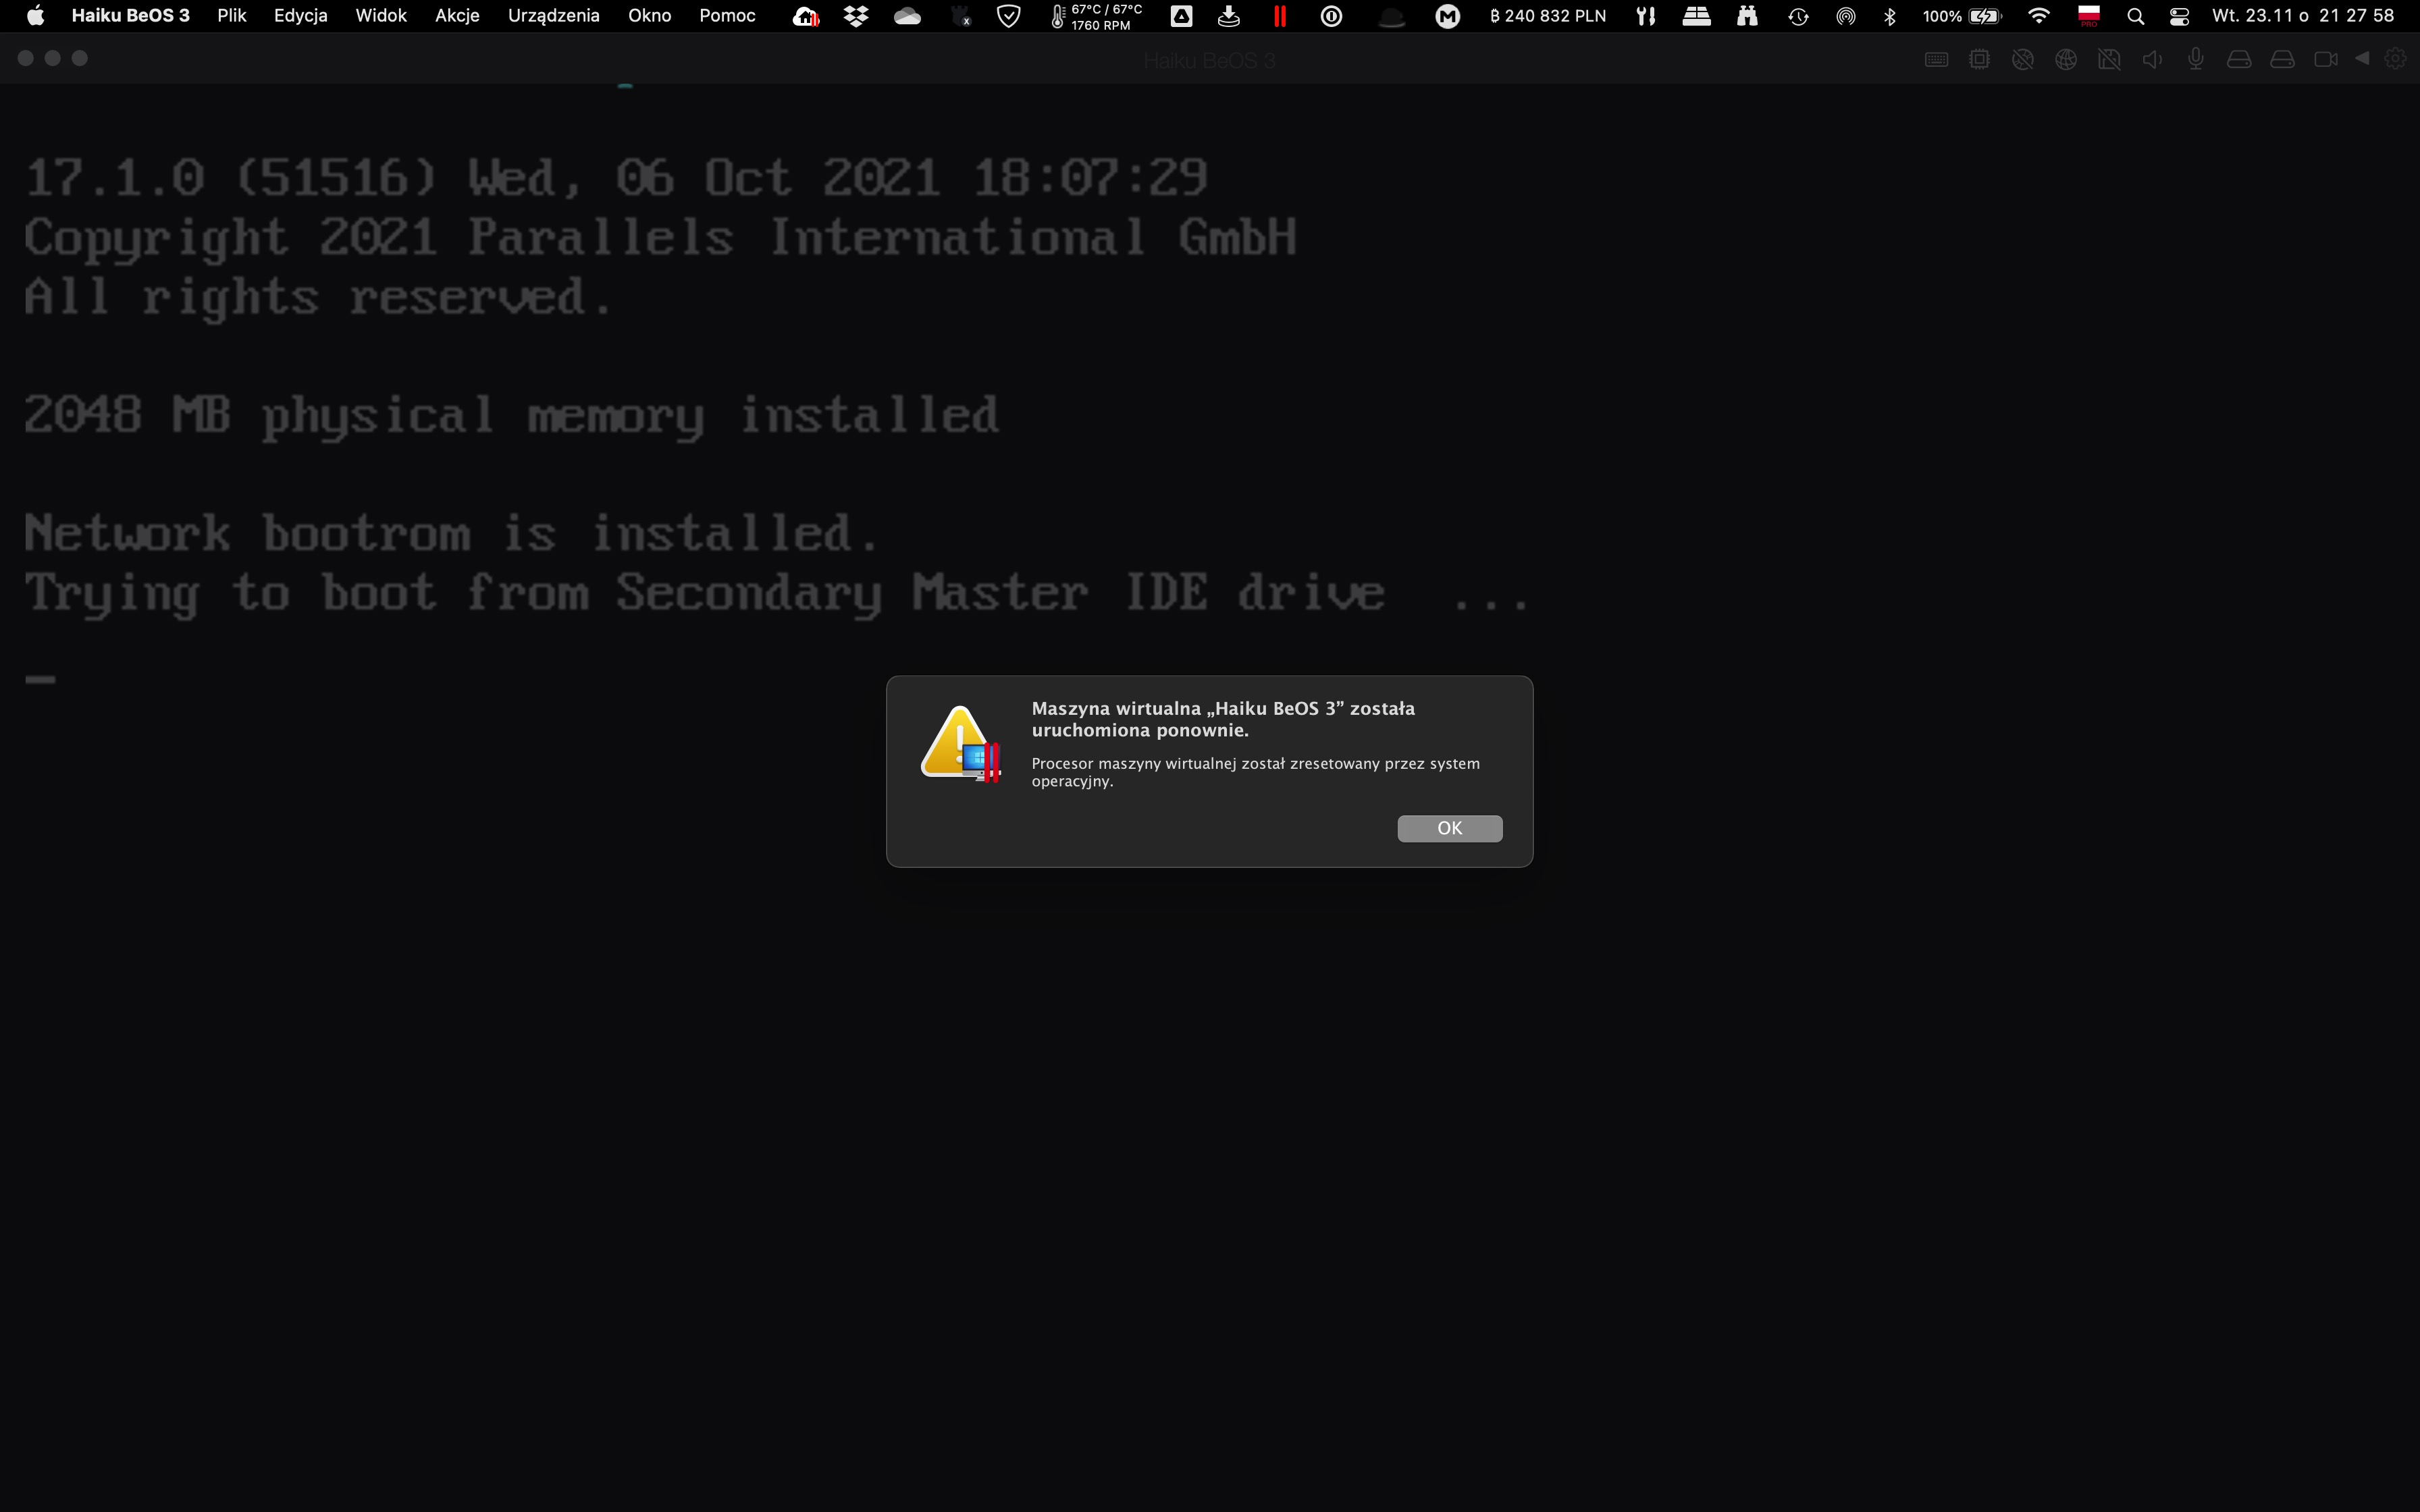
Yes, I did it. The installation goes with no problems. Although, after the small disk is removed Haiku doesn’t boot from 4GB drive and the booting process hangs. Looks like 4GB disk is not bootable at all.
I have repeated carefully all steps from the instruction numerous times. The effect is always the same.
The 4GB drive is visible and mountable at haiku. I can copy files to it, even run software from it while manually installed. In all other instances however remains useless.
It also depends on how you installed Haiku onto 4GB drive:
- On whole disk. In this case it should work.
- On MBR partition (BIOS PC) of the disk. In this case the partition should be made active.
- On GPT partition (EFI PC) of the disk. In this case check the
bootx64.efiis copied into EFI partition.
Please check the Installer last message, which says the boot code is installed to Haiku partition. If nothing else helps, try after finishing of installation to go to Installer menu and start installation of Boot Manager from it.
Alright, It was installed to whole disk. The installer concludes with the message “boot has been installed to HaikuHD”. I tried to set it up with boot manager, however it sees the ISO disk only and says that 4GB disk is incompatible. Helpless.
So, maybe it is better idea to prepare some partition scheme (say, MBR), create one partition of Haiku type and format it with BFS before installing? All this can be done within DriveSetup if in Installer you choose “Setup Partition” or something like this.
Sound reasonable. May I count on any idiot proof instructions? It is Parallels 17 on MacOS.
Sorry, I never used Parallels. Assume your MacOS is on Intel, not Arm? Or Parallels for Arm emulates x86-64 architecture?
It is on Intel.
this is what I get on the end
Time to give my Mac Mini a poke. Been a while since I installed Haiku on Parallels. Need to update Parallels to 17 (in process) and I will give it a try. I have to open up my VM to see how I handled it, but usually didn’t have too much trouble arriving a working solution. If I don’t get it tonight will proably be Thusday before I can report back.
1 Like
If you’re not using IDE for Harddrive interface, could you try that?
It’s IDE. Parallels automatic setting.
Any progress?
Parrallels is up to date. Grabbed the 64bit Beta 3 anyboot.iso. Renamed to end in .hdd . Created a new VM (was too lazy to restore my previous one from backup). Added a second Hard Drive, chose to use existing > chose Beta 3 anyboot.hdd. Set the boot order in the VM to 2nd Hard drive first.
Booted fine.
Started the installer. Was warned about no drive to install to. Launched drive setup (setup partitions). Started by initializing the disk as Intel MBR. Then created a partition for BFS - 10 GB, marked as active. Then initilized the partition as BFS. Closed Drive setup, selected the 10GB partition freshly created and hit install.
…
And that is where I got stuck Tuesday evening. Install finished - changed the boot priority in Parallels to put the VM’s orginal disk image with the 10GB partition first. Parallels currently errors out as soon as it tries to launch the VM. Had to travel Wednesday night through today and forgot to copy the VM to my MacBook I traveled with. Plan to take another look here shortly & will post again once I have more information.
1 Like
Still no luck. If I try to boot from the disk image with the active BFS partition that I installed R1B3 to, it just reboots right away. I am going to start over probably Tuesday night and hopefully get it booting correctly.
Sure seems like Parallels is getting more difficult to use with alternative OS’s - but its probably just me 
1 Like
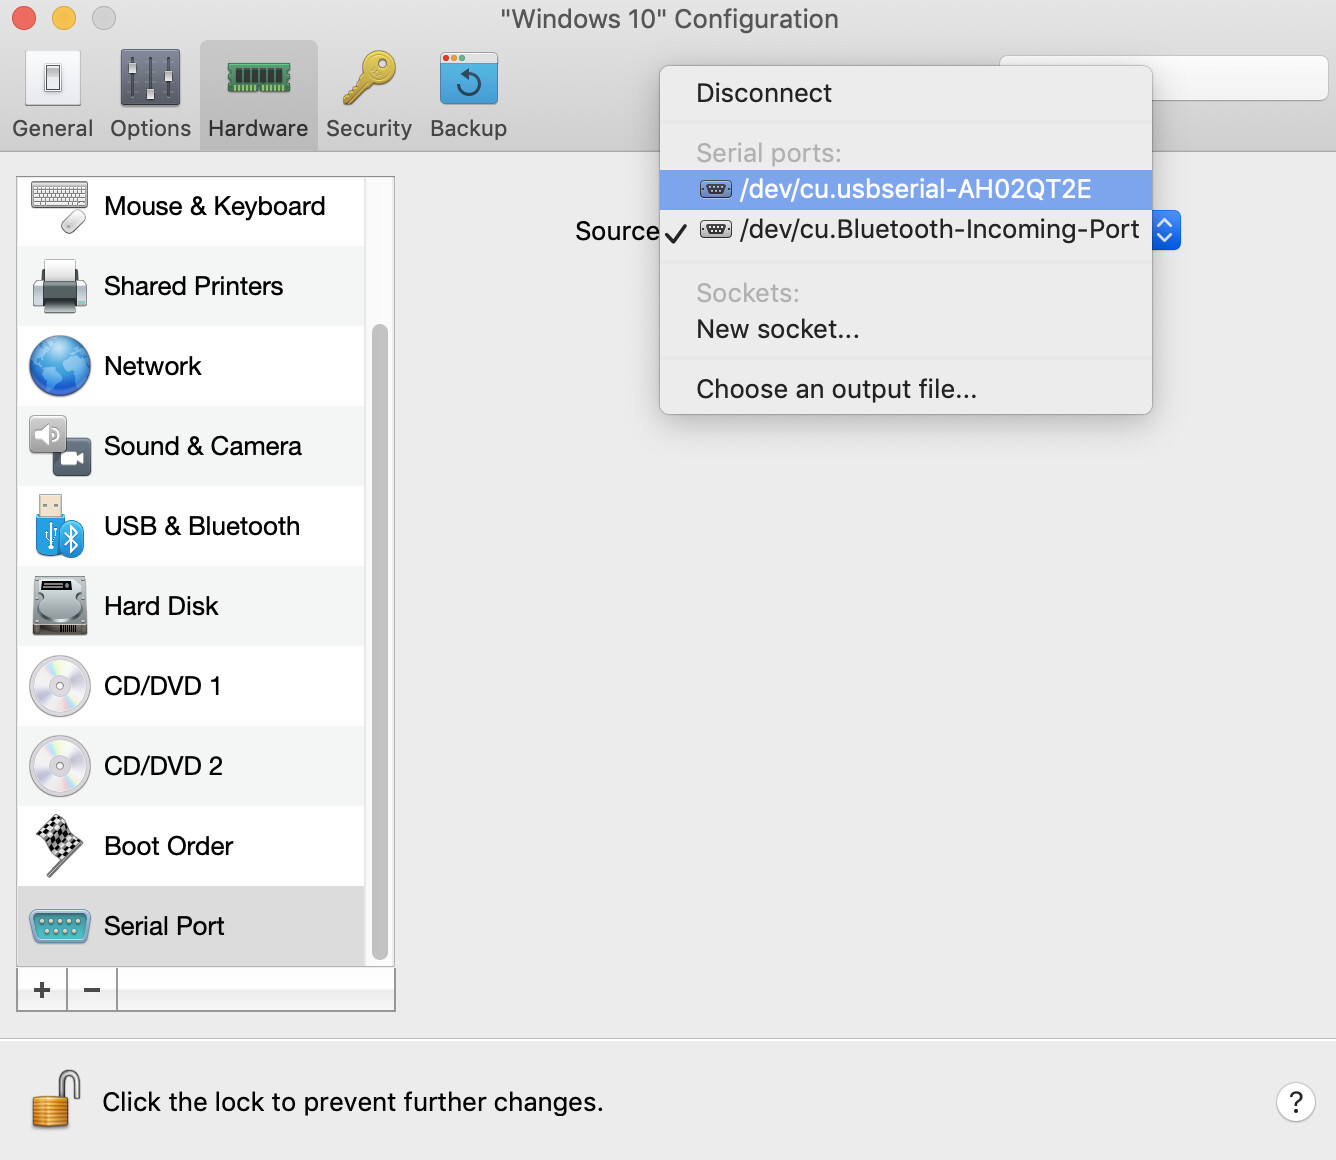
This sounds like a triple fault in haiku_loader/kernel. Does it manage to print anything to serial port if you add it to the vm and output to a file?
It’s not you, I’m afraid. Same results obtained. What irritates me most is the video tutorial quoted above. Following this step by step doesn’t lead to desired results.
Yeah I’m having the same problem. Tried various images (64-bit, 32-bit, beta3, nightlies). The install completes successfully but refuses to boot.
Wrote this all down just in case it helps.
- Downloaded haiku-r1beta3-x86_64-anyboot.iso
- Changed extension to .hdd
- Created “Other” VM
- Changed RAM to 2GB
- Changed Hypervisor to Parallels
- Changed Graphics Memory to 32MB
- Added another drive “Hard Drive 2” and selected haiku-r1beta3-x86_64-anyboot.hdd (converted when prompted by Parallels)
- Changed Boot Order so Hard Drive 2 with anyboot image is first
- Added Serial Port pointing to txt file
- Boot
- Select UK keymap and hit Install Haiku
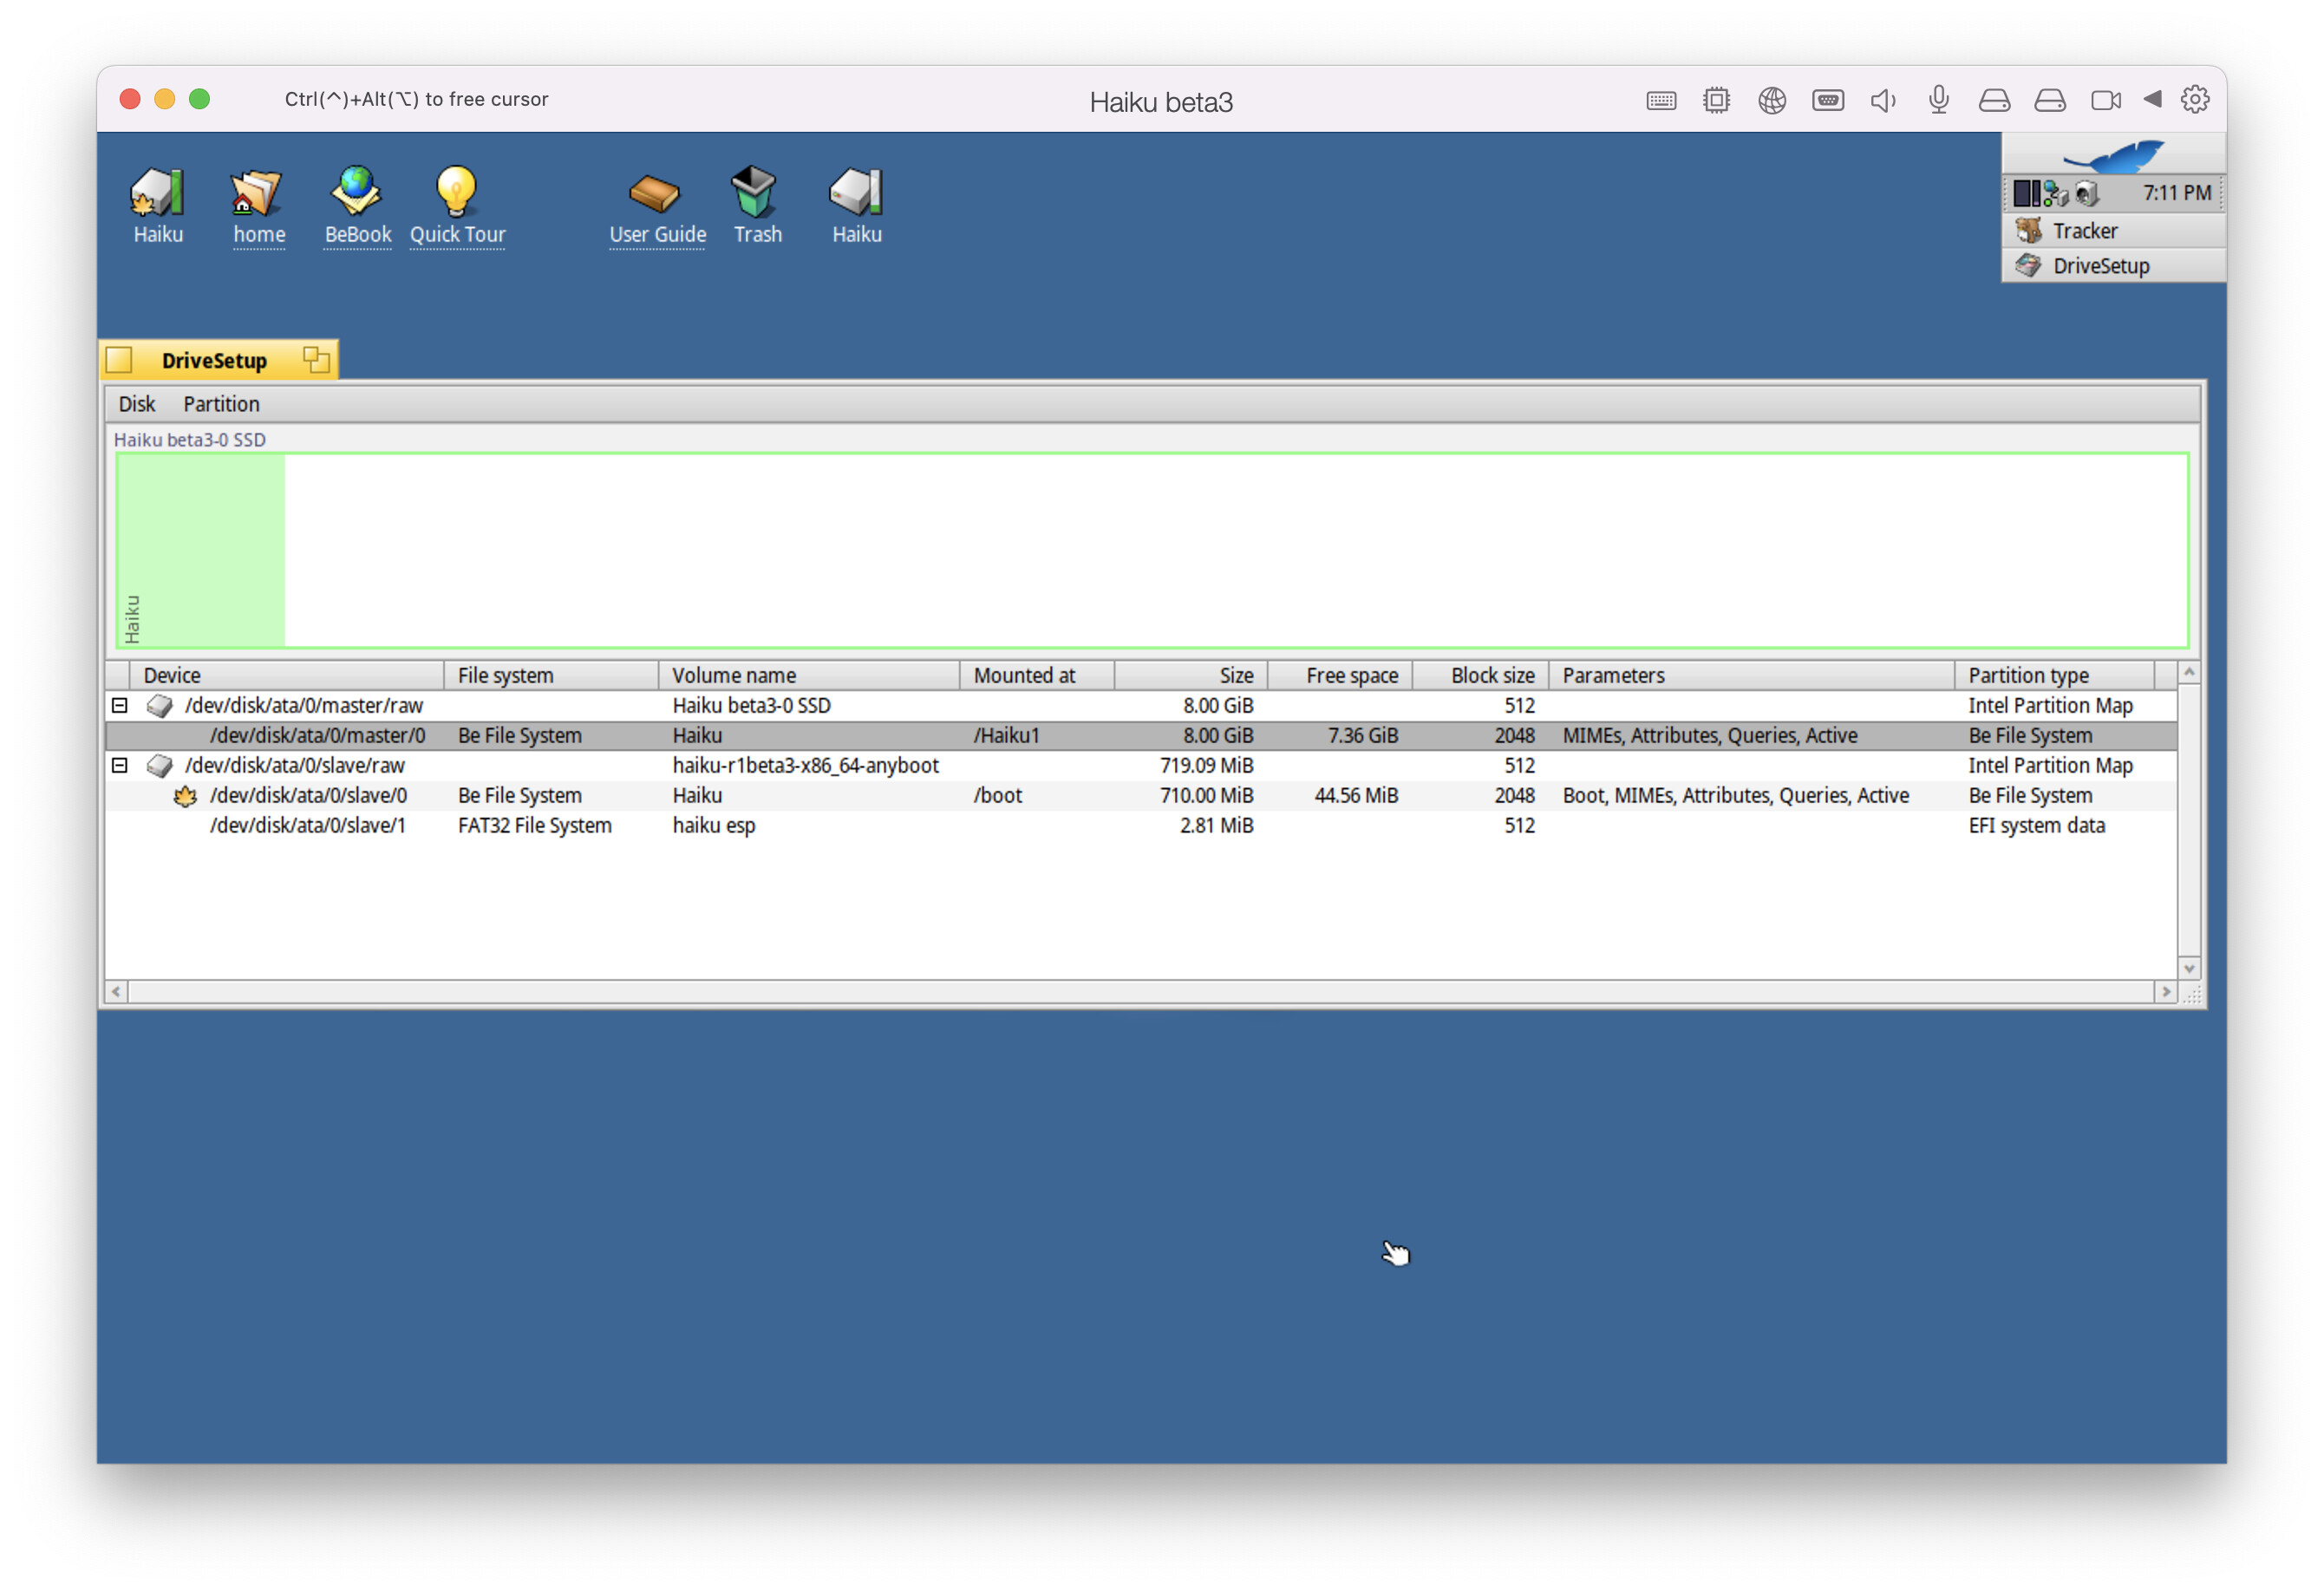
- Open DiskSetup
- Initialise Intel Partition Map
- Create Be File System partition with Active ticked
- Format Be File System with Enable query support ticked
- Closed DiskSetup
- Select newly formatted drive as target in Installer
- Select Write boot sector to MBR
- Begin install
- Restart VM
- Change Boot Order so “Hard Drive 1” with the new install is first
- VM refuses to boot
Notice two things in DriveSetup. I can’t get it to show “Boot” as a parameter on the fresh install drive. Also not sure what the leaf symbol signifies.
Even tried running “makebootable /dev/disk/ata/0/master/raw” which appears to be completing successfully, but doesn’t make any noticeable difference. Still unable to boot from that image.
Unfortunately with the new image as the first boot device nothing is written to the serial port. Here is the output form a good boot using the anyboot image just in case there are any clues here.
Welcome to kernel debugger output!
Haiku revision: hrev55181+51, debug level: 1
CPU: no microcode provided
CPU 0: type 0 family 6 extended_family 0 model 14 extended_model 7 stepping 5, string ‘GenuineIntel’
CPU 0: vendor ‘Intel’ model name ‘Intel(R) Core™ i5-1038NG7 CPU @ 2.00GHz’
CPU 0: apic id 0, package 0, core 0, smt 0
CPU 0: cache sharing: L1 id 0, L2 id 0, L3 id 0
CPU 0: features: fpu vme de pse tsc msr pae mce cx8 apic sep mtrr pge mca cmov pat pse36 clfsh mmx fxsr sse sse2 ss htt sse3 pclmulqdq ssse3 fma cx16 pcid sse4_1 sse4_2 x2apic movbe popcnt tscdeadline aes xsave avx f16c rdrnd hypervisor syscall nx long dts arat pln ptm tsc_adjust bmi1 avx2 smep bmi2 erms invpcid avx512f avx512dq rdseed adx smap cflushopt avx512cd avx512bw avx512vi xsaveopt xsavec
CPU 0: patch_level 0
reserve_io_interrupt_vectors: reserved 16 vectors starting from 0
mark_page_range_in_use(0x0, 0x100): start page is before free list
mark_page_range_in_use(0x0, 0xa0): start page is before free list